Sundryundies

Monday, July 25, 2011

I decided

not to build any more time machines. Instead I decided to try my hand at a project involving electronics mixed with furniture. I found an old tube stereo housed in a big console on Craigslist for $25. There isn't even a modern equivalent to these. I guess it's kind of an early entertainment center. It's a Zenith from the 60's.

I've had this idea for a while but couldn't find the right piece. My idea is to gut the inside and replace the old tuner, amplifier, and turntable with a modern tuner/preamp/amp, CD player, and turntable. So the exterior is all 60's cool, but the interior is all mod cons. And the sound should be a whole hell of a lot better. Tube stereos can sound good but this one wasn't particularly high end.

So that's one half of the project. The other half is to take the newly removed power amp and turn it into a guitar amp. I attempted this once before using a Magnavox power amp that a friend gave me. The problem was, I wasn't there when he removed it from the console and so when I got it it had a bunch of unlabeled wires hanging off of it. I didn't know what they were for and with no schematic I finally gave up on getting it to work. This time it should be a snap. Plus I know a little bit more about tube technology than I did then.


So here's a pic of the console:


And here's a pic with the lid up, showing the original stereo:


With the stereo components removed:


And here's a pic of the speaker array (rear cover removed):


Some of the basic stuff I plan on doing:

1) Remove the latticework speaker grilles for a bit cleaner look. (When I took the pics I had already removed one.)

2) Replace the black speaker grill cloth. The original stuff is faded and shows where the lattice was. I also would prefer brown.


3) Remove the section of the upper deck where the original stereo was. I'll be stacking my component stereo inside on the "floor" of the console with my turntable on top of the other components.


4) Remove the original speakers. I'm really, really hoping I can pull the speaker drivers from my Technics speakers and put them where the original speakers were. The original speakers have absolutely puny magnets and no umph. Plus the entire setup was open-backed. With any luck I can just screw the Technics speaker frames right where the old ones were, then add a rear sealed baffle giving it the same cubic footage as the Technics boxes. It's a big if, but if it works it'll be really cool. I love my Technics speakers and if they don't fit, I'll keep them as they are and just have them outside the console.


5) Currently, the console only opens on top. That gave access to all the original vertically-mounted components. I need access through the front too so I can get to my tuner and CD changer . The front doors you see in the pics are false doors. With some careful planning and cutting, I'm hoping to make them into real doors. Hopefully not impossible.


6) Refinishing. This is something I have no experience with. The exterior has some nicks and stuff that I could probably just touch up with a furniture pen. But because of the major modifications (lots of cutting) I'm doing to the interior, I'll need to finish/refinish it when I'm done.


7) Fix one of the legs. The legs are just screwed into the bottom piece of plywood. The wood is pretty dry and the screws on one of the legs have stripped the wood. I need to come up with a way to strengthen all four legs so it can tolerate being moved. I need to be able to slide it out to get to the back occasionally.


That's it for now. I think I'll figure out more things that need to be done as I move along.

Hello Earth!

I finally finished my time machine. It was fun meeting my future self and my past self and all that, but the damn thing broke and luckily I got stuck here in the present. But during my visit to the 1960's it seems I developed at taste for mid-century decor.

Saturday, June 13, 2009

So the other day I mentioned that the man in brown brought me some gifts. Some as in plural. Well the gift I didn't mention is an oscilloscope. I've had it on my wishlist for a while, but never wanted to spend the $$. New ones are in the range of $400+ and who wants to spend that kind of money on something that doesn't even make any noise?

I've kept my eye on used scopes on Ebay, but those are either $200 or they are sold as-is and untested. Well I finally took the plunge on an as-is untested scope.

I opened the box and powered it up and at first I couldn't get it to do anything but crackle and smell funny. After a little fooling around I realized I was going to need a manual. So I bought one of those on Ebay too. Using the manual I got a little closer, but it was not working nearly correctly. I did some troubleshooting and replaced a couple of parts and it finally came to life.

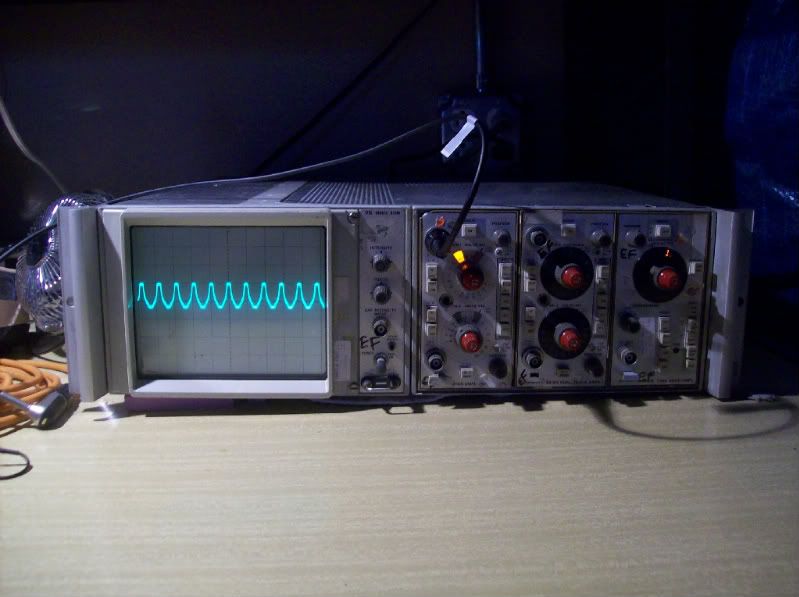
This is what it looks like right now when I feed it a sine wave:


Obviously, that's not a good sine, but at least I'm in the ball park now. I should be able to figure some things out and get it where it needs to be.

Note the stack of Post-its under the front left corner. Without it in place, the screen goes blank and the crackling sound comes back. I spent an hour or so trying to figure out what's causing it, but no luck.

Friday, June 5, 2009

Drilled all the holes. Took about an hour, nonstop. So now what?

Thursday, June 4, 2009

Ain't she luvly?


Got a visit from the man in brown today. He brought me some gifts. One of them was an order from one of my favorite places to shop online: MOUSER. They sent me my 12V AC wall wart and blank PCB stock.

TO THE BATGARAGE, ROBIN!

First up was testing out the power supply I built. After switching a diode around that I had put in backwards, I fired it up.... -12.0V/+11.97V. YEAH!!

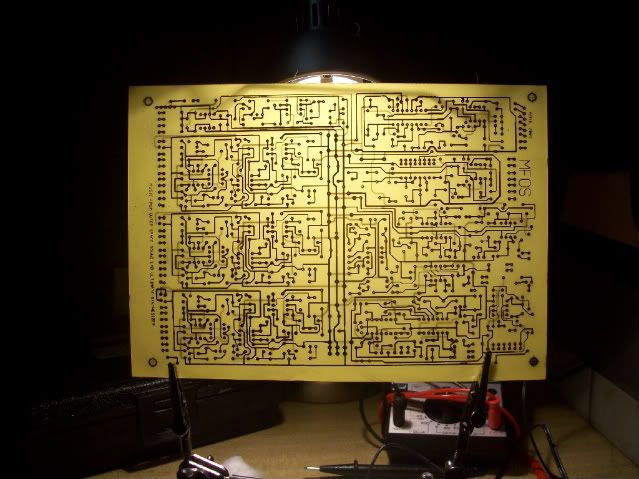
So then I got to work on the making the PCB. Now THAT was a bitch! Double-sided PCBs are my arch-nemesis. I've only somewhat successfully made one double-sided board in the past and I didn't even end up populating it. And there were many scrapped attempts. In fact, that power supply PCB was supposed to be double-sided and I ended up trying and failing. Fortunately, it was easy to make it single-sided with just one jumper. That would not have worked with this PCB. So I used ALL my powers of PCBing and came out a winnar!

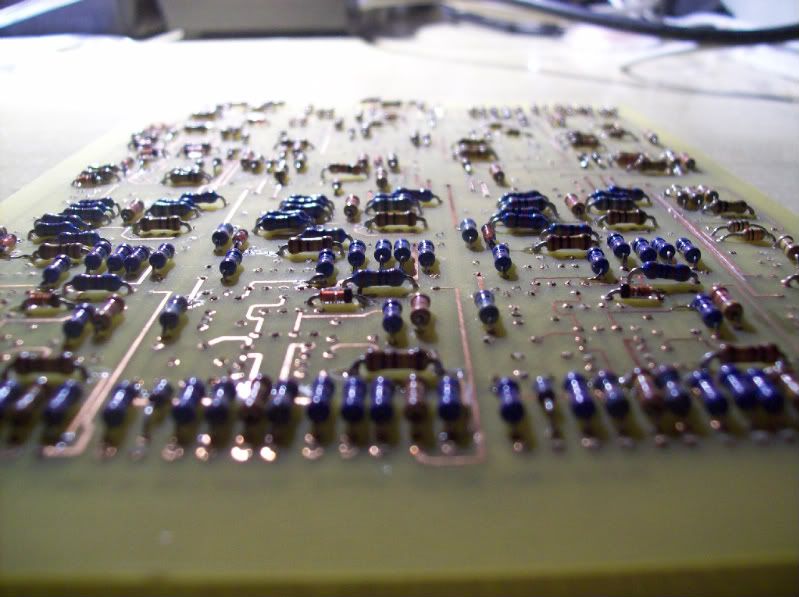
You can see in the pic, the holes on each side of the board lined up perfectly. This is no mean feat! Props to Mouser for stocking translucent PCBs. It doesn't help with lining up the holes, but it makes for much cooler pics! So I'm glad to be finished with that stage. I did have to clean up a lot of bridged traces with an X-acto. The traces on this board are pretty close together. Next step... drilling about a million tiny holes!

I didn't order any of the components. Gotta put that off till payday.

Tuesday, June 2, 2009

You are now about to enter.... the THIRD dimension!!

I found a cool application online. It's Google's Sketchup. It's basically an entry-level 3D CAD program made simple and pretty for everyday folks. You don't have to be an engineer to use it.  I'm already thinking of all the trouble I could get into with this program. And it's FREE!!

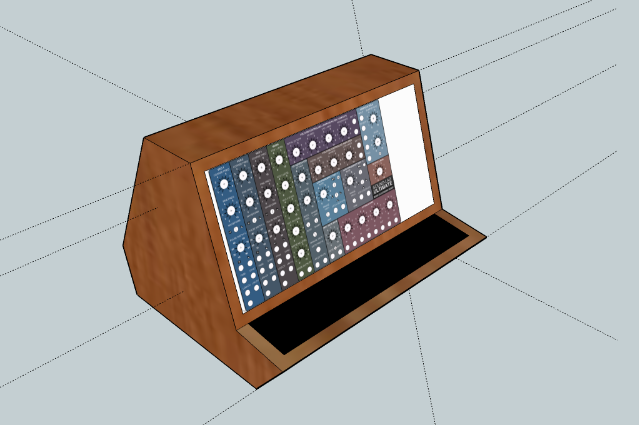
Last night I did a model of the case for the MFOSSU. Wasn't too tough, but there is a (very) little learning curve. Not nearly as hard to learn as a vector-based graphics program.

Gonna make the case out of some nice hardwood--maybe walnut. The white space on the right is where the expander panel will go (it has some extra functionality: ring mod, ADSR, and some other stuff that the main unit doesn't have). The panel is posted on the MFOS site, but I don't think it's finalized yet. So I'm gonna wait before I do anything with it.

The big black rectangle is a tray. It's basically just a nice convenient spot to put all the patch cables when they're not being used. I may end up using that space for some small modules, more like guitar effects... delay, chorus, phaser, etc. that I'll be able to patch into.